Quick and Easy DIY Tarantula Enclosure – Arboreal

A simple, attractive, and stackable arboreal enclosure.

Having spent the last year burying and repurposing just about every conceivable container for use as tarantula cages, I’ve finally settled on a few sizes and styles that I plan to use from this point on.

Enclosure-sterilite

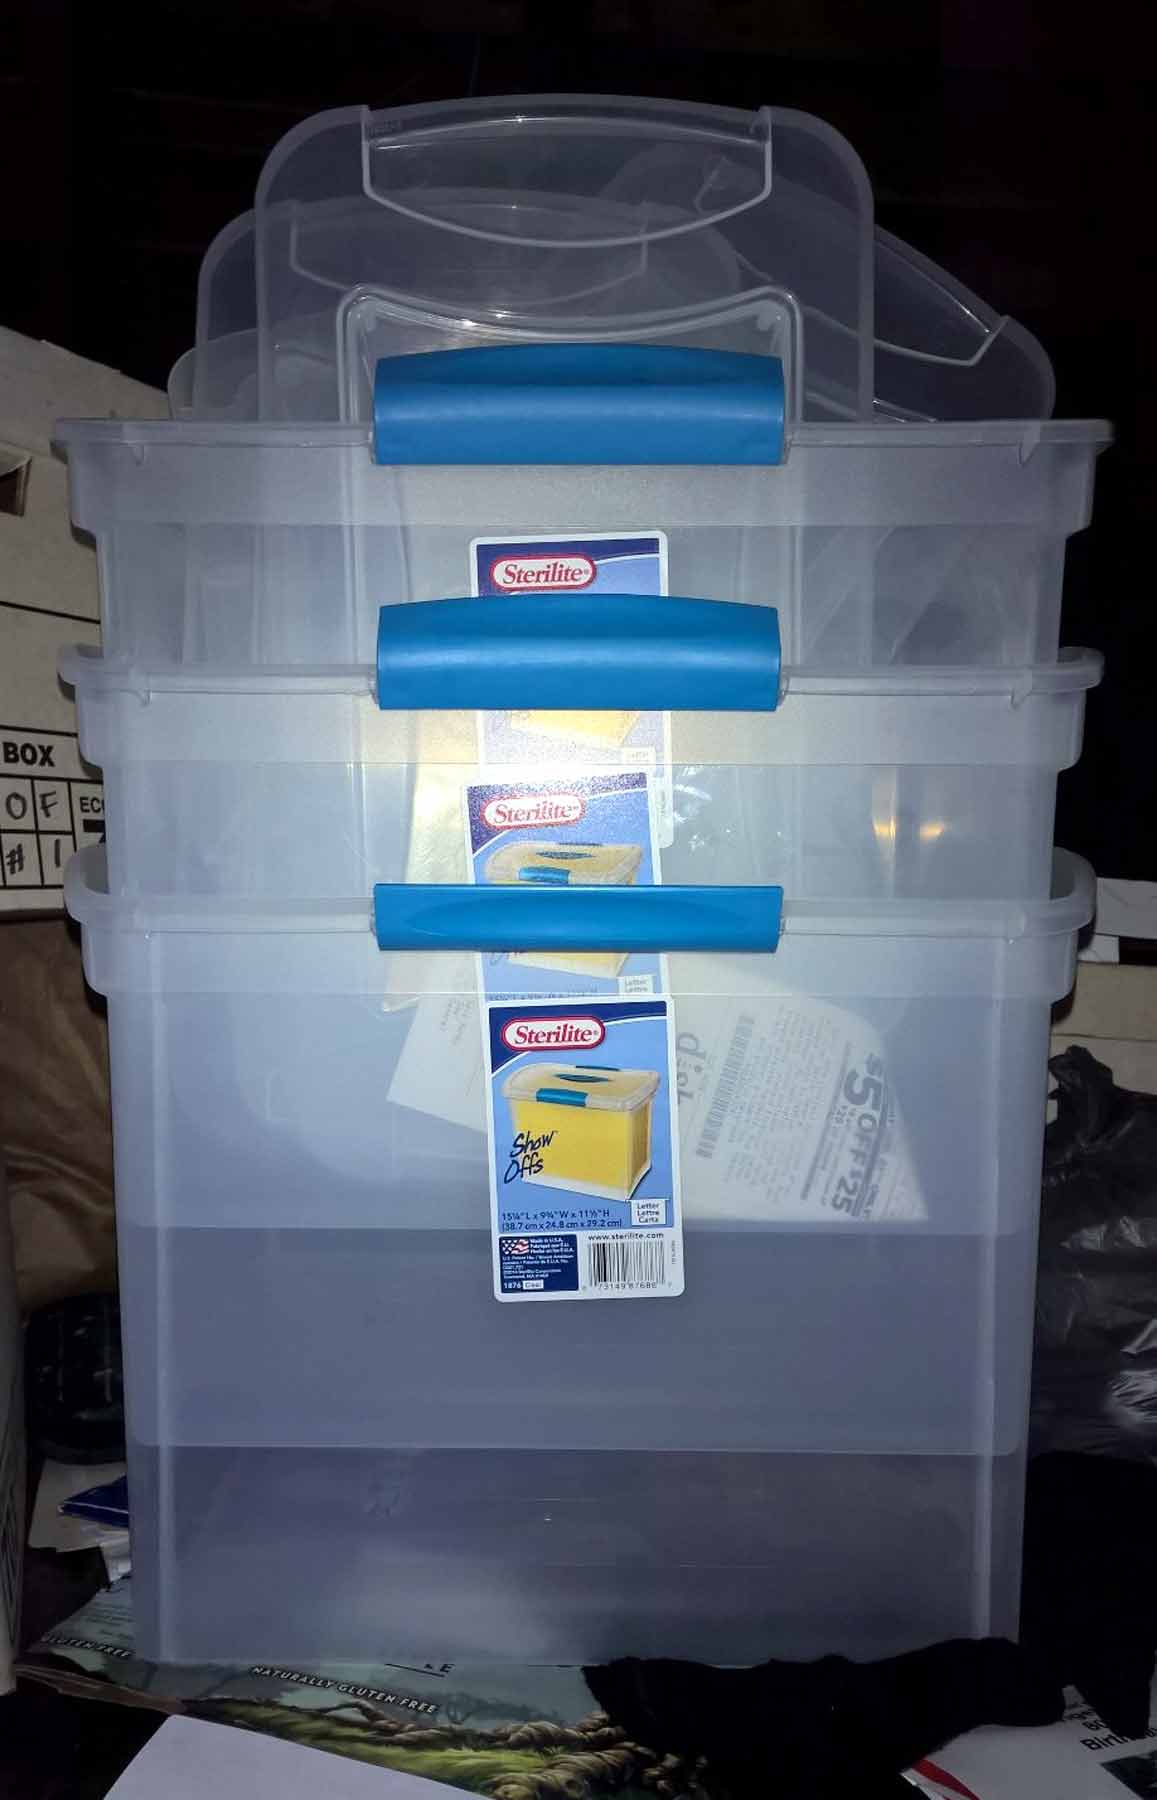
I’ve found the large Sterilite Show Off containers, which are designed to hold hanging files, are very versatile and perfect for both fossorial (burrowing) and arboreal enclosures. Measuring 15.25″L x 9.75″ W x 11.5H, they leave plenty of depth for deep substrate or height needed when housing an arboreal.

If I’d planned ahead, I might have ordered some 3″ plastic vents from roundvents.com, However, this would have been a more aesthetic choice; holes work just as well.

To put together one of these enclosures, all you’ll need is:

  • Sterilite container
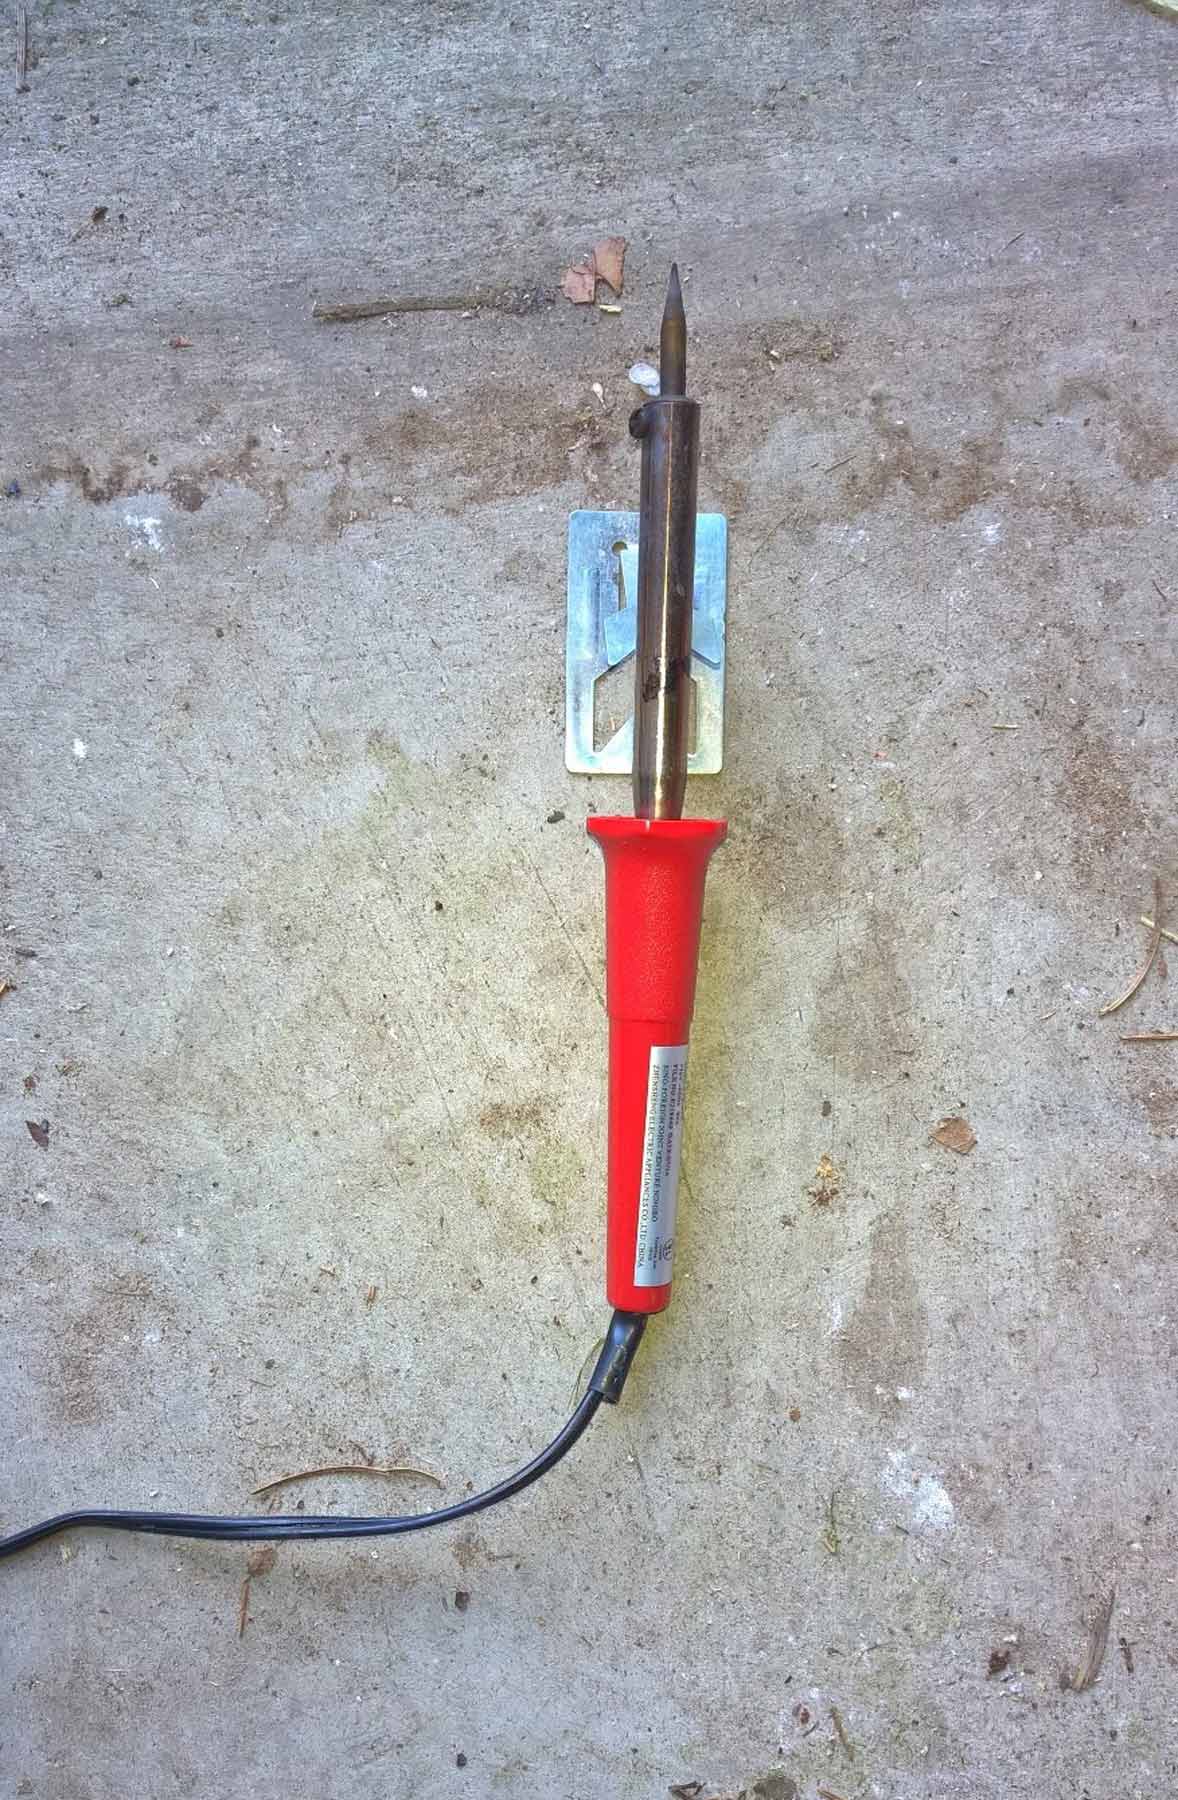
  • Soldering iron (for burning holes)
  • Glue gun
  • Substrate (I’m using a mixture of top soil, coco fiber, peat, and a bit of vermiculite).
  • Sphagnum moss
  • Cork bark flat
  • Water dish
  • Fake plants (optional)

1. Ventilating the enclosure

First off, if you find yourself making a lot of DIY tarantula cages, then immediately head over to Amazon and invest in a soldering iron. The one I use is manufactured by J&L, and it costs just over $10 (money VERY well spent).

Enclosure-iron

Using the soldering iron, I make a series of holes horizontally starting about an inch below the lip of the container. As you’ll be housing large juveniles to adults in this setup, you can use a bit more pressure on the iron to make larger holes. I will do about five to six rows of these on each side, spacing the holes about 1/4″ apart or so. For the arboreal enclosure, you are going to have more vertical space, so it’s okay to put holes lower on the side of the enclosure. However, for a fossorial species, you’ll want to keep the holes toward the top to allow for adequate substrate depth.

You can add holes to the other sides as well if you prefer, but keep in mind that if you’re trying to create a micro-climate, too much ventilation will make it very difficult for you to maintain optimum conditions. I do not add holes on the lid, as this just allows moisture to evaporate faster.

2. Add the substrate.

This one is pretty self-explanatory. For an arboreal enclosure, you want to add 2-3″ of packed-down substrate. Appropriate substrate can be coco fiber (Eco-earth), peat, organic (no animal products added) top soil, or any mixture of the those. For more on substrates, feel free to check out this link.

3. Arrange the water bowl and cork bark

Because we’re setting up an arboreal enclosure, we’re going to be using a cork bark flat set at an angle. Now, cork bark can be quite pricey when purchased at a pet store, so I’ve been buying mine from New England Herpetoculture (NE Herp). Not only do they carry an amazing supply of everything you would need to decorate an enclosure (fake plants, bamboo, cork bark, etc.), but their prices are fantastic. A 13-16″ long slab costs about $10 and yields you enough bark for about three enclosures if you section it.

You want to lay your piece of cork bark at an angle, wedging the bottom of it into the substrate so that it doesn’t slip down. When positioning it, try to ensure that it doesn’t cover up your air holes as well.

Enclosure-top-down

I will usually put the water dish at the base of the cork bark, just off to the side. You don’t have to get fancy with what you use for your dish, either. Some folks use souffle cups or other “found” items. I like to use these small, white ceramic water dishes that I found at Petco. I know Petco has a rep for being over-priced, and the items sold in their brick and mortar stores usually are. However, if you sign up for their online newsletter, you’ll discover that they are constantly having 25-40% sales, often with free shipping after a certain amount. I usually end up paying only about $1 per water bowl, which I think is pretty darned good. I’ve also managed to score some gorgeous fake plants there for 50% off.

4. Add some sphagnum moss.

I generally buy long fiber sphagnum moss from my local Home Depot. It’s about $5 a bag, and it is enough to set up several enclosures. I add the moss behind the cork bark (my poecilotheria species like to use it to build “curtains”) and around the water bowl. For species that require a little more humidity, you can moisten down the moss to help keep the moisture levels up.

5. Decorate!

Now, if I’m being honest, the majority of my enclosure setups are rather spartan. However, for some of my big arboreals, I like to go the extra mile. Not only does it make for a beautiful display enclosure, but by adding some faux foliage, I give my spider more places to hide.

For this enclosure, I used my glue gun to glue some plastic leaves to my piece of cork bark. I also added an artificial plant next to the cork bark to give the animal more security (and, it looks darn pretty). I purchased both of these on sale at Petco during a 40% off sale. For the leaves, I buy the plastic vines then just pop the leaves off to use as needed.

6. Finally … add your spider!

It takes me about an hour to set up three or four of these enclosures, and most of that time is spent melting the ventilation holes in the plastic. As for cost, the Sterilite container retails for $5.99, the water dish was $0.99, the cork bark was about $3, and the plant (which is optional) was $5.99. So, this enclosure cost me about $16. Considering that it will housing my gorgeous, and pricey, female P. metallica, I think it’s well worth it.

Enclosure-stacked

Ken The Bug Guy – A Review

Dealer Ken

Another Wonderful Experience!

I’ve actually ordered from Ken The Bug Guy several times over the past year, and all of my experiences have been positive. Ken always has a wonderful and varied selection of animals, and he is quite well-respected in the business, so it’s a no-brainer to order when I see something I like.

This review is of my most recent purchase made on November 28th. With several of the dealers offering great savings through Black Friday/Cyber Monday sales, I spent a couple days of cross-referencing my wish list with the stock each vendor carries to determine who I should buy from. After much deliberation, I decided that Ken carried the most species I was currently looking to acquire, and the 30% off sale he was running made the prices ridiculously reasonable.

The website does not always accurately reflect stock.

Now, I’ve ordered from Ken’s four times now, and this is not in any way meant to be a knock, but it’s something that anyone looking to order from his site needs to be aware of. Ken does a lot of business, whether it be through trades, shows, or his website, and sometimes animals listed on his site are not in stock when you try to place your order. On three separate occasions, I’ve placed an order and received an email saying that something I wanted was no longer available. When this occurs, Ken will immediately offer a full or partial refund your or allow you to make a substitution. Other times, he will offer a size upgrade that more than makes up for the inconvenience. When I place an order now, I shoot him an email at the same time and ask him to just let me know if something is out of stock so I can substitute.

As always, great communication and fast shipping.

With a huge sale going on, I anticipated that this would be the case with my most recent order. Although two of the tarantulas I ordered weren’t in stock, the ones he offered to substitute for them were worth far more than the originals. Suffice it to say, I was left very happy with the final transaction. As usual, Ken’s communication is always excellent, and he responds to all emails promptly and politely. He communicated with me repeatedly throughout the transaction, and answered all of my emails within hours of me sending them.

With the amount of business he was doing during this sale, I anticipated that there might be a delay shipping my package. I was delighted when I got the shipping notification from FedEx on Sunday saying my package would be arriving on Tuesday. My package was available for pick up at my local FedEx on time and as expected.

Excellent packing and very healthy spiders.

Okay, so for anyone who usually reads my reviews, you know that I like to take pictures of the unpacking. Well, full disclosure: I was so focused on unpacking and rehousing six fast, venomous Ts, that I completely forgot to break out the camera. Whoops! I can tell you that the box was expertly packed with a foam lining and moistened newspaper as cushioning. He also included three heat packs, as temps in my area were hovering around freezing, and the animals were safe and warm when I opened the box.

Now, I mentioned it in an earlier review, but it bears repeating: well-packed tarantulas make the rehousing process so much easier and less stressful. Each specimen was packed in a plastic dram bottle lined with rolled paper towel. To get them out, I needed only to pull the paper towel plug blocking the opening, then use tongs to slide the paper towel tube out. I could then either just use a paintbrush to gently prod the T out, or I could unroll the towel tube to free the animal (in one case, I left the animal in the towel tube in the new enclosure so the T could come out on its own). Very simple!

Kens-Pachy-open

My new E. pachypus in the bottle with the paper towel lining removed.

My new E. pachypus in the bottle with the paper towel lining removed.

Kens-pacy-towel

All of my new animals were in great shape and, in many cases, larger than I had expected. Even better, all six of them ate their first meals within 24 hours of being unpacked (the three Poecilotheria species I got ate the same night). It has been about a week since the package arrived, and they have continued to eat and adapt to their new homes.

For those looking for a great variety of tarantula species, expert packing, quick shipping, and excellent communication, make sure to give Ken the Bug Guy a try!

Check out Ken’s selection HERE!

Great Basin Serpentarium – A Review

A fantastic spider shopping experience!

I recently discovered Great Basin Serpentarium while perusing the For Sale/Trade/Want to Buy section on Arachnoboards. I had been on the lookout for some T. stirmi slings, and GBS was offering 1.5 spiderlings for $90 each. Checking out the rest of the list of Ts for sale, I was excited to discover the they were also offering many other species I had been looking for. The prices were quite good, and I was floored to learn that they offered $20 FedEx next day shipping with any order of totaling $100 or more. 

I shot the owner, J Mugleston, an email query about a possible purchase, and he got back to me within the hour. In fact, his communication throughout the entire experience was exemplary with all of my emails being answered promptly and politely. Last Friday, I put my order in for seven slings: 2 T. stirmi, 2 P. muticus, 2 M. cabocla, and 1 B. auratum.

Mr. Mugleston worked with me to ship my items to the local FedEx on a day of my choice, and I picked up my package yesterday. The box was labeled “Harmless Invertebrates”, which I though was a nice touch (the clerk at the counter actually handled my package as if it were dynamite!).

My package for GBS. LOVE the labeling!

My package for GBS. LOVE the labeling!

My new acquisitions were very well packed in a box lined with foam insulation and crumpled newspaper as padding. A heat pack was included, which was great due to the unseasonably cold temps we’ve had in my state. Each spider was packed in a plastic dram vial in moistened paper towel, and the bottle lids were taped with electrical tape. These little guys were well-protected during shipping.

My package from Great Basin Serpentarium. My Ts were warm and very well packed.

My package from Great Basin Serpentarium. My Ts were warm and very well packed.

I should mention that the way the tarantulas were packed in the vials made it VERY easy to get them out for rehousing. The paper towels were packed in tightly enough to protect the T, but loose enough that towel could be carefully pulled out of the vial and unrolled to safely free the animal. This made rehousing these little guys a breeze.

The vials holding my new slings from GBS. All were well packed and labeled.

The vials holding my new slings from GBS. All were well packed and labeled.

The slings themselves were in fantastic shape, and it was obvious that they were healthy and well cared for. All were lively during rehousing, and all but one has already eaten (one of my P. muticus slings was a bit too busy burrowing to grab a snack).

Great prices, communication, and shipping costs!

I could not be more pleased with my experience with Great Basin Serpentarium. The prices, especially with the $20 next day shipping, were fantastic, Mr. Mugleston’s communication was outstanding, my order was perfectly packed, and the animals arrived healthy and lively. I would definitely recommend GBS to other tarantula enthusiasts, and I will definitely be shopping there again in the future.

And…a couple pics of my new acquisitions!

My new .75" P. muticus sling.

My new .75″ P. muticus sling.


My new 1/5" T. stirmi sling.

My new 1/5″ T. stirmi sling.


Phlogius crassipes (Australian Barking Spider)

 A tarantula from down under!

My 2.5" P. crassipes sling.

My 2.5″ P. crassipes sling.

Anyone who grew up watching Steve Irwin, AKA ‘The Crocodile Hunter”, knows that Australia is home to some of the most stunning and awe-inspiring wildlife on the planet. Heck, I still own the carpet python I bought after seeing him handle (and get bit!) by one. When I stumbled across my first photo of a species of tarantula from Phlogius genus, and discovered that it was from Australia, I knew that I would eventually keep one.

With a common name of “Eastern Tarantula”  or the more colorful variations of “Queensland Whistling Spider” or “Australian Barking Spider”, this thick-legged Old World species can reach lengths of 8 inches. It earned the name “whistling” or “barking” spider because this species stridulates, or uses hairs on its body to produce a loud “hissing” sound when it’s agitated. And for those who don’t heed this warning, its large fangs can deliver a potent bite.

Deep, moist substrate = happy spider!

I purchased a 1.5″ sling from Anastasia at Net-Bug back in April of this year, and it has quickly become one of my favorite species. So far, my P. crassipes has been a fast-growing species, molting twice in my care and putting on about an inch in size. As a sling, it started off as a chocolate brown color, although as an adult it will be mature into a smoky dark brown/black coloration.

In Australia, this species lives in deep, moist burrows and enjoys a higher-humidity environment. Keeping that in mind, I gave my sling an enclosure with four inches of moist substrate so that it could create its own burrow. I set the enclosure up in much the same way I do with all of my moisture-dependent species. After laying a half inch of wet vermiculite on the bottom, I then packed down a mixture of peat moss and coco fiber with some vermiculite added for water retention and percolation. I don’t add too much vermiculite as it can make the soil difficult to pack for the burrowing species.

The soil should be moist, but not wet. A good test is to squeeze your mixture in your hand. If you can squeeze water out of it, it’s too moist. However, if it sticks together and holds its shape without water dripping from it, it’s just right.

The enclosure itself is a modified plastic Sterilite storage container. I keep a water bowl in the enclosure at all times, and I will re-moisten the substrate once a week. I do not spray, but rather use a clean water bottle with holes melted in the top to “make it rain”, so to speak. I also allow water to dribble down into the burrow. This keeps the lower levels of his den moist, and keeps the humidity in the enclosure up as it slowly evaporates.

The custom enclosure for my P. crassipes sling.

The custom enclosure for my P. crassipes sling.

For temperatures, my P. crassipes is kept between 72 and 78º. Although I’ve read reports of people keeping them at higher temperatures (mid-80s is mentioned quite a bit), I’ve found that mine has been thriving with more moderate highs and lows.

A lightning-fast eating machine!

Within a day, my P. crassipes had dug a burrow all the way down to the bottom of the enclosure with two different entrances. It then created a “volcano” shaped structure over the top of the substrate and webbed around this. He likes to sit at the top of this construct with his legs just poking out as he waits for prey. As soon as a prey item hits the substrate, he tenses up and prepares to hunt.

This species has proven to be a fantastic eater. It receives 2-3 medium crickets a week, and so far it has yet to refuse a meal.  When I once dropped in a large cricket, this amazing little predator had no problem snatching it up. Speaking of snatching up prey…

These guys are FAST.

Besides more specific moisture requirements and an Old World bite potency, keepers need to be aware of this species’ speed. I’ve been dazzled on a couple occasions by just how fast my little guy can move. I once watched him bolt out of his “volcano”, snatch up a cricket, and retreat back into his den in a blink of an eye.

The footage below was meant to be a feeding video, but he unfortunately didn’t snag the cricket here. Still, it serves as a wonderful example of just how quickly they can move. So far, my sling is more skittish than defensive, although this could change at any time. With his speed, this T could easily bolt out of his enclosure if I’m not careful.

A fantastic tarantula for those who like thick, sleek, fast species.

The P. crassipes’ potent bite, skittish and sometimes defensive nature, and tremendous speed mean that this guy probably isn’t for the novice keeper. Those use to keeping slower, more docile species might find the crassipes a bit overwhelming. However, any keeper experienced with faster Old World Ts would likely find the P. crassipes to be an amazing and rewarding animal to keep.

Tarantula Enclosures from Lorex Plastics … A Review

Gorgeous enclosures that wont break the bank

With several of my tarantulas reaching adult sizes, I found it was time to do some enclosure shopping. As I stated in an earlier blog, I use a variety of enclosures, including DIY and premium, professionally-made varieties. Premium enclosures can be costly, and when you have 50 or so Ts, you could end up spending more on the homes than you do on the animals. That said, I do have tarantulas that I consider worthy “showcase animals” that I like to show off to visitors. For these specimens, I don’t mind splurging for classier enclosures.

I had discovered Reptile-Enclosure.com last year while looking for large acrylic enclosures for my Ts. When I was first pricing cages on the site, I discovered the majority of the sizes were no longer in stock, and I wrongly assumed the company was no longer in business. In actuality, Reptile Enclosure.com is owned and run by Lorex Plastics Co, a plastics company that makes reptile and tarantula cages during the slow seasons. For those interested in these enclosures, this is something to keep in mind.

As luck would have it, I stumbled on Lorex’s eBay listing for two of their enclosures, and decided to check out the site again. I was ecstatic to discover that almost all of the sizes and types were in stock, and they were definitely still in business.

Lorex offers several types of enclosures, including arboreal and terrestrial varieties, as well as front-loading and hinged topped designs. For tarantulas, I specifically looked at the 3 mm Series, which includes convenient 2 gallon, 5 gallon, 7 gallon, and 12 gallon sizes.

I ordered three of the 5 gallon enclosures, which measure 17″ x 9″ h x 8″w and retail for $47.50 before shipping. Also, Lorex offers a 15% discount if you buy three or more cages of the same size, so I was afforded those savings as well. I phoned to ask a couple questions about my order, and spoke to Ed. Communication was excellent, and Ed was very friendly and helpful via phone and email.

My order was shipped promptly, and as Lorex is located just on the other side of my state, they arrived via UPS in a day. I always worry when I order acrylic cages, as I know how unforgiving the shipping process can be. However, my new enclosures were packed so well, nothing was going to harm them in transit. Each of the three cages was wrapped in five or six layers of bubble wrap, then individually boxed. These three boxes were then packed into another larger box for added protection. Wow.

One BIG box filled with three of Lorex's 5 gallon enclosures

One BIG box filled with three of Lorex’s 5 gallon enclosures

Each enclosure came wrapped in bubble wrap and in its own box.

Each enclosure came wrapped in bubble wrap and in its own box.

I was very pleased to discover that each enclosure was wrapped in 5-6 layers of bubble wrap.

I was very pleased to discover that each enclosure was wrapped in 5-6 layers of bubble wrap.

The cages themselves are well-constructed and just gorgeous. Each top-hinged door has a lip that overhangs the front and locks with a hasp. As these can be used for reptiles as well, they’ve been designed to have a 1/2″ of clearance beneath the bottom to allow for an under the tank heat mat (note: do not use heat mats for Ts). I love the look of the aluminum vents, although I’ll have to keep an eye on them as some terrestrial Ts have been known to chew through wire.

My only nit-picky issue is that the vents are not glued or otherwise permanently affixed to the cage, but this is a very small issue. I do love the position of the vents, as they allow for a deeper level of substrate than some of my other cages afford. The enclosures also feel very solid and sturdy, which is great.

5 gallon Lorex Acrylic Enclosure. Notice the lip and locking hasp.

5 gallon Lorex Acrylic Enclosure. Notice the lip and locking hasp.

I definitely recommend Lorex acrylic enclosures for anyone looking for a premium cage to display one or more of their prized tarantulas. They come in a number of convenient sizes, they are wonderfully constructed, and even with shipping, the prices are lower than other comparable acrylic enclosures sold elsewhere. Customer service was top notch, and Ed at Lorex was a pleasure to deal with. I’m already eyeing a couple of the 12-gallon versions for when my L. parahybana and P. antinous get a bit larger.

To check out these wonderful enclosures, click here!

My enclosure decorated and now the new home of my L. itabunae.

My enclosure decorated and now the new home of my L. itabunae.


P. antinous Pre and Post Molt Pics!

Wow…just WOW.

When I purchased my P. antinous a few months ago, it was partly because I had read that they were voracious eaters who made huge size gains between molts. As I have enjoyed watching my female ravage any prey items dropped into her cage, I already knew that she was a lively eater. But what would the next molt bring? Would she really make a huge size jump?

The answer is a big HECK YES.

After a few week long pre-molt period, and another week in her den as her new exoskeleton hardened up, my P. antinous female finally reemerged this morning. To say the change in appearance and size is profound would be an understatement. Gone are the rusty red/brown tones she sported before entering promolt. She now sports the dark gray/blue colors that lend her the common name of Steely Blue.  Her abdomen is also covered with some very striking red hairs which prove a wonderful contrast to the rest of her body.

My 3.5" P. antinous female. (before a recent molt)

My 3.5″ P. antinous female. (before a recent molt)

As for size, when I originally purchased this female, she was a hair over 3.5′. Although I haven’t been able to get an exact measurement yet, she is now definitely 5″ or more. The size change is astounding; the claims about huge size gains are not in the least exaggerated. She is gorgeously leggy and moves like lightning when disturbed.

My female P. antinous after her recent molt. She went from around 3.5" to about 5".

My female P. antinous after her recent molt. She went from around 3.5″ to about 5″.

She has already had her first post-molt meal, a large dubia roach, and I’m sure she’ll continue to be a great eater. Now that I’ve seen the growth for myself, I can’t wait to see what the next molt brings.


DKS Death – A. insubtilis

This is an update to an earlier blog. If you’d like to learn a little more about DKS (and read about the unfortunate T I’m about to reference), please check out my earlier blog HERE.

My first tarantula death.

Although I knew it was coming, it still stinks. I arrived home from work yesterday to discover that my A. insubtilis juvenile had succumbed to whatever had caused its DKS. It was a little over a week since it had first showed signs of the discombobulation and lack of coordination that characterize this malady.

My A. insubtilis tarantula after succumbing to DKS. It's been flipped on its back, but this is the standard tarantula "death curl".

My A. insubtilis tarantula after succumbing to DKS. It’s been flipped on its back, but this is the standard tarantula “death curl”.

Despite being kept in an ICU for the last few days of its life, it was not able to pull through. I will be heading over to Arachnoboards later this week to fill out a death report. As the true cause of the DKS symptoms are still a mystery and could be attributed to many factors, T keepers are encouraged to add details from their cases to a data base on the board.

With any luck, this will be be my first and last experience with DKS. It’s a very unpleasant experience to watch one or your pets die from it.


L. parahybana Feeding Video and Husbandry Notes

After 17+ years of keeping a G. porteri, and with no idea that the tarantula hobby had exploded over the past two decades, I decided that I wanted to see what kinds of species were currently available. To say the number of animals available in the trade was overwhelming would be an understatement, and I soon found myself compiling lengthy lists of potential candidates. After several months of research, I decided on two slings; a Chromatopelma cyaneopubescens (GBB) and a Lasiodora parahybana (LP).

I purchased my LP sling in October of 2013 at a size of about 3/4″ or so. This species has a reputation for being a very fast grower with some keepers reporting their LPs reaching 4″ in a year. Mine has molted five times in the time I’ve kept it, and in that time, it has grown to about 1.75″.  I wouldn’t say this is the fastest-growing T I keep, but it molts like clockwork every two months, and puts on a little size each time.

Besides their awesome adult size (8″ is the norm with 10″ possible), it was their rather simple husbandry that attracted me to this species. I keep mine fairly dry and only moisten the substrate in the corner once a week, letting it dry out in between. I’ve provided my 3″ female with a water dish, which I overflow to provide a moist spot. Usually, it quickly ends up filled with dirt. The substrate is a 50/50 mix of coco fiber and sphagnum peat moss, and for the slings, I give them several inches of depth as they like to dig.

For the first five months I kept my LP, I rarely saw it. The little guy had dug an extensive burrow beneath the surface, and he would only pop out to snatch a prey item. There was a two-month period where I never saw it at all. When entering premolt, it would often close off  the entrance of its burrow for weeks at a time. Eventually, the hole would reopen, and I would catch a glimpse of my slightly-larger LP.

I keep my LPs at the same temps as my other Ts; high 70s during the day and low 70’s at night. They are great eaters, only refusing a meal if in premolt. Like my P. cancerides, they usually attack their prey with gusto, often rushing at it from across the enclosure.

As slings, LPs are quite skittish, and will quickly bolt or dash down into their hides with the slightest disturbance. My female is a bit more brave, often sitting right out in the open instead of using her hide.

I know keep three LPs; two slings and the gorgeous female my wife gave me for my birthday. I look forward to the day that these beasties mature into an 8″+ behemoths.

Below is a recent feeding video featuring my 1.75″ juvenile.

Box of Roaches … A Review of Jeremy Stichler!

Having amassed a collection of 47 tarantulas and counting that now includes many larger spiders, I was finding it more difficult to keep adequate food supplies handy. Although I’ve used mainly crickets for prey, I also keep a small quantity of Blaptica dubia and Blatta lateralis roaches. Having found that the dubias were easier to maintain and relatively odorless, I started keeping a lookout for a fairly priced starter colony.

While perusing the for sale page on Arachnoboards, I stumbled on an ad for 125 count starter colony of large Blaptica dubia for only $27 shipped. The vendor was Jeremy Stichler (Jerm357) who had several pages of sparkling reviews on the boards. Having priced out starter colonies before, I was expecting to pay much more for this many roaches (and that was not counting the 10% overcount he offered on top of it). Even better, he guaranteed all larger roaches unless specified that you wanted smaller ones.  I jumped at this tremendous bargain and immediately emailed Jeremy.

Communication was excellent, as Jeremy emailed me back immediately with payment information. Correspondence was friendly and very professional, which is always a huge plus in my book.  He also shipped quickly, and my package was mailed USPS Priority on that Monday and arrived on Wednesday.

Box arrived in great shape.

Box arrived in great shape.

Packing was excellent, with the roaches double-boxed and insulated with newspaper. There wasn’t a single dead roach in the bunch, and all were quite lively when I opened the package. In fact, one of the larger males quickly shot out of the package and landed on my arm. Now, I know I have dozens of giant, hairy spiders, and most would find that frightening, but I don’t think I’d ever seen a roach that big. And, perhaps I panicked just a bit when I tried to quickly brush it off and the little beast barely budged. Wow, those suckers are strong…

After opening the first box, I discovered a second box safely nestled in a bed of newspaper. (Note: Notice my 3-year-old's creepy Mega Blok figure. Those little pagan-looking totems are all around my house. Creepy!)

After opening the first box, I discovered a second box safely nestled in a bed of newspaper. (Note: Notice my 3-year-old’s creepy Mega Blok figure. Those little pagan-looking totems are all around my house. Should I be worried?)

The second box is now open. A piece of cardboard serves as a spacer. You can now see some of the roaches...yum!

The second box is now open. A piece of cardboard serves as a spacer. You can now see some of the roaches…yum!

With the cardboard moved aside, you can now see more of the little buggers.

With the cardboard moved aside, you can now see more of the little buggers.

With the cardboard (and some of the roaches) out of the way, you can now see a bunch of very large and healthy roaches.

With the cardboard (and some of the roaches) out of the way, you can now see a bunch of very large and healthy roaches.

All of the roaches have been rehoused in their new home (I will post later about their new quarters), and all are eating well. I honestly couldn’t have been more happy with my purchase from Mr. Stichler. I wouldn’t hesitate to buy from him again.

This was an A+ experience, and I would highly recommend Jeremy Stichler to any hobbyist looking for a dubia feeder roach starter colony.


Pamphobeteus antinous

As my T collection grows and I gain experience with different species, I’m finding that I’m developing an affinity for the larger South American Ts. Don’t get me wrong, there is definitely a place in my collection for some of the slow-growing genera, like aphonopelma, grammostola, and brachypelma. Many of the species in these genera are simply gorgeous, and their slow growth rate means that I’ll have these guys for many years. However, for the impatient keeper in me, the faster-growing, aggressive eaters are just a thrill to watch. Recently, I decided to investigate some new  species for potential purchase, and I wanted something big and feisty.

While perusing the Net-Bug site, I came across a Pamphobeteus antinus, or “Steely Blue Leg”, female for sale. I had researched several species in the Pamphobeteus genus many months back, and at that time, I wasn’t sure I was ready for a T that required a bit more humidity. Having gained some experience since then and become more skilled at maintaining humidity in the enclosures, I decided that I was ready for this species.

My 3.5" P. antinous female.

My 3.5″ P. antinous female.

For my new acquisition’s home, I set up a large Kritter Keeper with about 5″ of a moist 50/50 peat moss and coco fiber mix. As the heavily-vented tops of KKs allow for too much ventilation for species requiring higher humidity, I used contact paper to block off much of the top and sides while still allowing for cross ventilation. Using a 5″ cork bark round, I sunk part of into the ground as a starter burrow and covered it with soil and sphagnum moss. As I want to maintain a higher level of humidity, I also provided her with a large water dish. Once a week, I sprinkle water on her substrate and on the sphagnum moss (think a good, quick rain shower) to keep the substrate from drying out too much. For temperatures, she is kept in the low 70s during the night, and high 70s/80 during the day.

A large Kritter Keeper modified to accommodate a species with higher humidity requirements.

A large Kritter Keeper modified to accommodate a species with higher humidity requirements.


It didn’t take long for the P. antinous to create an impressive burrow. Gnawing through the bottom of the cork bark, she dug straight to the bottom, constructing a small compartment in the lower corner. Here she sits until she detects prey items above. Alerted to a meal, she bolts from her hide, her lithe legs tapping against the plastic as she scrambles for the surface. Out of all of my Ts, this is the first one I’ve actually HEARD coming for a cricket. The speed and ferocity she displays when attacking her food easily rivals that of my P. cancerides. Right now, she gets four large crickets, or two 1+” dubia roaches, a week (this species is known for being a good eater).

My P. antinous inside its den (back view).

My P. antinous inside its den (back view).

With my female still sporting her immature reddish-brown colors, I will look very forward to seeing if she gets any of her “steely blue” coloration on next molt. Also, as this is also considered to be a species with a fast growth rate, I will be anticipating quite a size jump. Although I’ve only owned her for a couple months, my P. antinous is proving to be one of my most interesting tarantulas.