Perhaps one of the most fun facets of T keeping is the never ending quest for the perfect tarantula enclosure. Whether you’re a money-is-no-object keeper interested in assembling the most aesthetically pleasing enclosures, or a more frugal enthusiast who wants to save precious funds for future spider purchases, there are literally thousands of options available. Once you are thoroughly hooked on the hobby, you will find yourself wandering the container section of your local Dollar Tree, Walmart, or craft store measuring up plastic canisters for size, price, and alter-ability. And, for your “showcase” spiders, there are many attractive options that won’t break the bank.
As I’ve done a lot of experimenting with enclosures, both professionally constructed and “found” varieties, here I will present some of the ones I’ve continued to use along with some of the pros and cons. These enclosures are listed in no certain order.
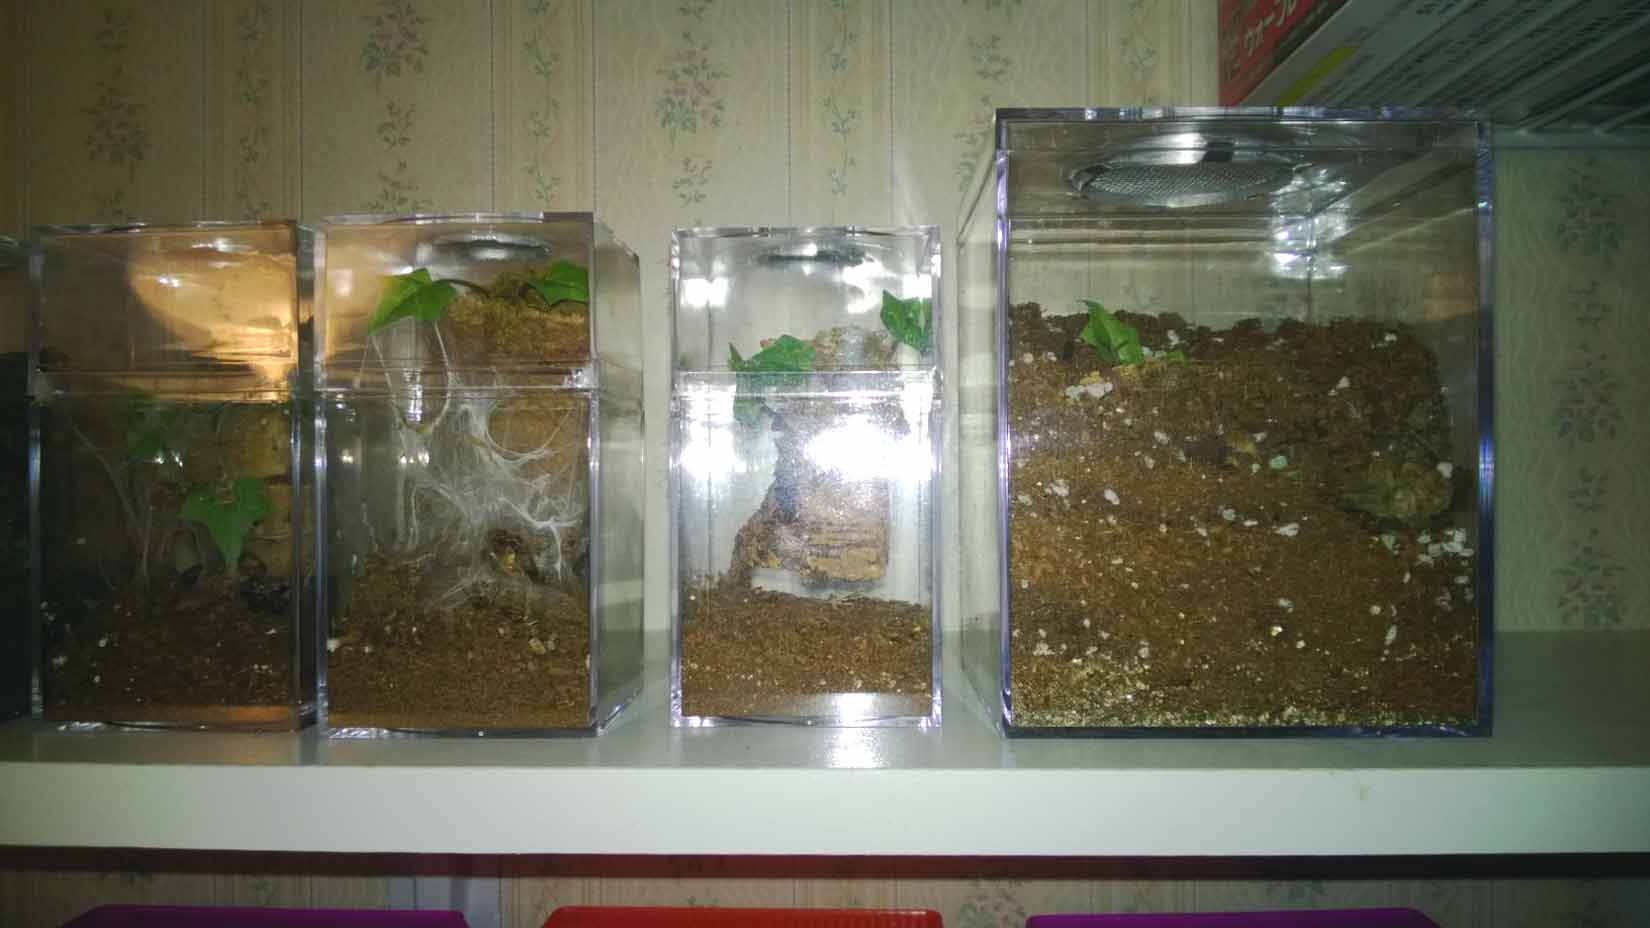
Adult Tarantula Cage from Jamie’s Tarantulas
Retail: $64 (With substrate, moss, cork bark, and water dish, $84)
For keepers looking for a more attractive home in which to house their Ts, but who don’t want to pay upwards of $100 for a cage, Jamie’s acrylic tarantula enclosures are fantastic. These 8″x8″x14″ cages are perfect for most large tarantulas sized 4″ to 7″. She offers the option of purchasing just the cage, or you can get the Complete Cage package with all the fixings for $20 more. The crystal clear acrylic offers complete viewing from all angles, and the hinged door can be locked for security. Also, I have found these enclosures to be much more durable and well-constructed than other acrylic enclosures I have used.

Acrylic tarantula cage from Jamie’s Tarantula – Terrestrial set up.

Acrylic tarantula enclosure from Jamie’s Tarantula – Arboreal Set-up
Even cooler, the cages are specially designed so that they can be used as both terrestrial OR arboreal cages. I have three of these beauties; two house terrestrial Ts, and the other is set up for my arboreal A. metallica. The air vents on both sides allow for good cross-ventilation while keeping in precious humidity. Both sizes are offered in either Terrestrial and Arboreal versions.
Spiderling and Juvenile Enclosures from Jamie’s Tarantulas
Retail $7.95-$13.95
For slings and juveniles, Jamie also offers Spiderling and Juvenile Enclosure kits. These wonderful and affordable cages come with all of the fixings (substrate, moss, silk plant, cork, and water dish for the juveniles), and they are often offered as a package deal with a sling or juvie. I’m particularly enamored with the spiderling kits, as the offer great visibility and seem to limit the chance for escape when opening for feeding. When buying from Jamie’s, I also find it incredibly convenient that I can get my sling and the enclosure at one place.

Spiderling and Juvenile Enclosures from Jamie’s Tarantulas. These are sold as kits with all of the fixings.
Exo Terra Nano Glass Terrarium
Various sizes /Retail: $34.99-$67.99
These all-purpose terrariums are gorgeous, and with prices starting at $34.00 (or even less expensive if you catch them on sale on the Petco website). The black framing looks very sharp, as does the foam faux-rock background. These tanks also offer two ways to access them, with both a front door and a removable screen top.
It should be mentioned, these are not designed exclusively for tarantulas, and some models suffer from some design issues that make then less than ideal. For example the unique venting system beneath the door prevents owners from packing in more than a couple inches of substrate in the bottom. With 5 or more inches of space between the top and the substrate, a plump climbing terrestrial T could fall and injure itself.

An Exo Terra Nano Tall (left) and regular 8 x 8 x 8.
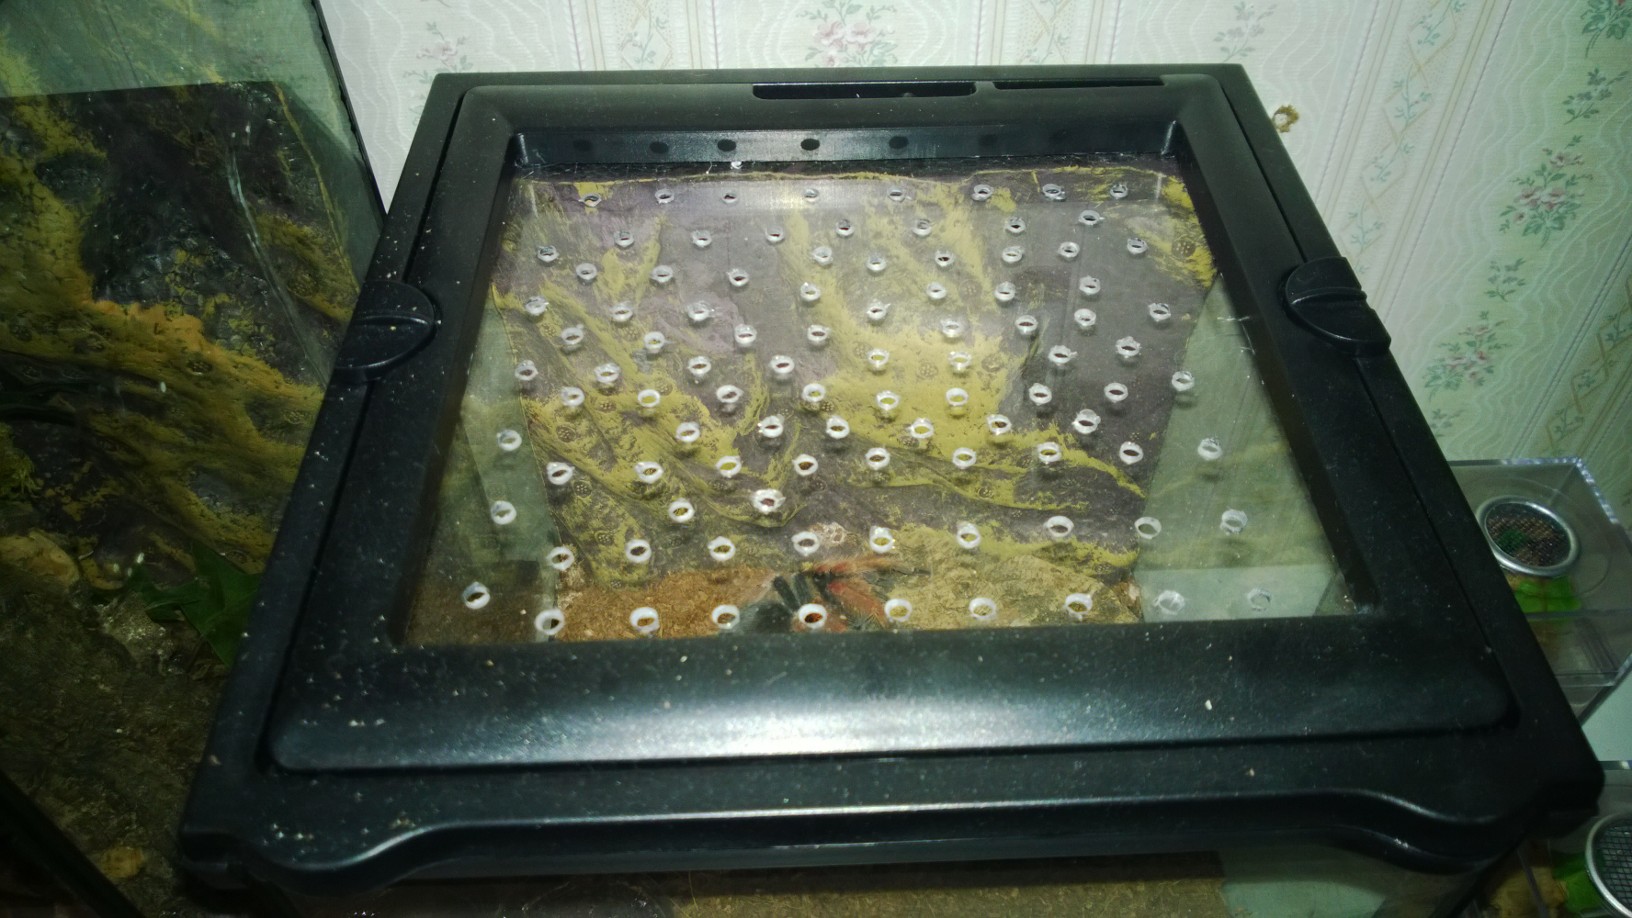
Also, the screen top can be a problem for terrestrial Ts whose legs can become stuck in it. To combat this issue, the cage top can be altered by ripping out the screen and replacing it with Plexiglass with several breathing holes drilled into it (see below).

The top of a Exo Terra Nano, modified for a terrestrial T. The screen has been removed and replaced with ventilated Plexiglas.
The Exo Terra Tall, on the other hand, makes a fantastic home for an arboreal with no modifications. The 8″x8″x12″ tall enclosure is the perfect size for a medium arboreal species, and makes for a stunning display. For species that require a higher humidity, you can block off part of the screen top with saran wrap or plastic (as I have done with the one housing my P. vittata), to slow evaporation. And, for a T who may get 7″ or longer, the larger Exo Terra Mini Tall (12″x12″x18″) will do. These larger models feature two opening doors, which can make cleaning or feeding faster species a bit easier.
Kritter Keepers/Pet Keepers (both trademarked and generic)
Various sizes / Retail: $3.99-$19.99
These clear plastic containers with colored plastic lids are produced by several different companies, come in many different sizes, and are made to house small animals including hermit crabs, fish, reptiles, and insects. They also happen make quite good homes for tarantulas and have become a staple for keepers looking for attractive, low-cost enclosures.

Medium Sized Kritter Keeper/Pet Keeper. I use these to house my juveniles.
These nifty little cages are great for burrowing Ts due to their depth, and the covers have wonderful little windows on the top that double as a feeding hatch. They can be found online through Amazon and Petco.com (Once again, Petco’s sales and free shipping can really make these a steal), and Walmart even carries the medium sized cages in their fish section.
As for cons, there are only a couple issues. First, larger holes where the handle connects to the lid, and another round hole meant for running tubing, can both be potential escape routes for small and determined Ts. It’s best to fill these three holes up with a little hot glue before using the enclosure. Also, because the entire lid is vented, water and moisture will evaporate quickly in the winter months. To combat this issue, use plastic wrap and tape to close of some of the vents.
Sterilite Plastic Storage Containers
Numerous sizes / $1-$15
The go to enclosure for T enthusiasts with huge collections. These plastic containers come in just about every imaginable size, and they are generally quite inexpensive, with many of the larger sizes going for less than $3. Sterilite even makes a set that locks securely and is designed to stack (see photo below).
To make the ventilation holes in cages meant to house slings, there are a couple alternatives. The easiest is to use a soldering iron (the one I use was about $10 on Amazon, and has been a dream). The tip of this iron comes to a conical point, meaning that you can use various levels of pressure to make any size hole you need. I can use just the tip to make tiny holes for small spider enclosures, or use more pressure to make up to .24″ holes for larger ones.
A more time-consuming way to create the holes is to heat a very small nail on an oven burner, pick it up with pliers and use it to melt holes through the plastic. I will actually use several nails on a burner so that I always have a hot one ready. You can usually put three to five holes in before having to trade nails. A word of caution: make sure to have adequate ventilation, as the plastic fumes can be dangerous.
For cages meant to house larger Ts, a power drill is the easiest and fastest way to perforate the plastic for ventilation. When positioning holes I try to create cross ventilation by putting some holes lower on one side and higher on the other.

A Sterilite plastic container modified to house tarantula slings.
Mainstay Plastic Canisters
2-Quart and 1-Gallon Sizes / $1.99-$3.99
I love these plastic canisters. The 2-quart size is perfect for juvenile arboreals or terrestrial burrowing species. These inexpensive plastic jars can be found at any Walmart, and are easily ventilated using the hot nail method. As I wanted adequate ventilation, I used a 2″ hole saw and aquarium silicone to put a 2″ inch vent in the lid.

Plastic canister modified with lid vent and side ventilation holes.
Ziploc or Tupperware Plastic Containers
Various sizes / small 3 for $3.57 / medium 2 for $2.57
There are dozens of these types of containers on the market; I just happen to prefer the Ziploc Twist ‘n lock for the wonderful screw on caps. Like the other plastic containers, these can be vented using the hot nail method. The small containers are perfect for terrestrial slings, and the taller medium sized ones are great for arboreals in need of climbing room.

Ziploc container modified to house arboreal tarantula.
At the time of this blog, I have several other containers that I will be altering and trying out as enclosures, and I will surely add to this list as I discover new possibilities.
Also, I should point out that I did not include two of the most popular enclosures used by hobbyists. Clear plastic pill bottles and plastic deli cups are immensely popular due to their very low cost and practicality, and many keepers swear by them. It just so happens that I currently use neither, as I prefer Jamie’s spiderling enclosures. However, as my collection grows, and I get into breeding, this is likely to change.