The magic of trial an error.
With a 4-5″ Theraposa strimi (Burgundy Bird Eater) on the way, I needed to create a custom cage that would allow me to maintain proper conditions for this animal, namely the higher humidity requirements. I’ve experimented with many smaller setups, and have had good luck maintaining the right balance of airflow circulation and humidity for my moisture-loving species.
However, this enclosure would need to be a much larger. Plus, as Theraphosa require moist soil and consistently higher humidity levels, I needed to make sure that whatever I came up with was working out before my new T arrived.
It’s been about a week since I put it together and, with some experimentation and “revisions”, it is now working great. Waiting to have the T ship until I finished proved to be an incredibly prudent move, as this cage soon became a work in progress. For those interested, here is what I did:
The Materials
I started with a Ziploc 60-Quart Large Watertight Storage Box, which I purchased at Walmart for about $17. This container is quite spacious (23″L x 17″ W x 11″ T) and has six locking clasps around the edges. Nothing will be able to squeeze under the lid of this one. The lid also has a foam gasket in it to prevent precious moisture from escaping. This will make an excellent home until my T gains some more size.
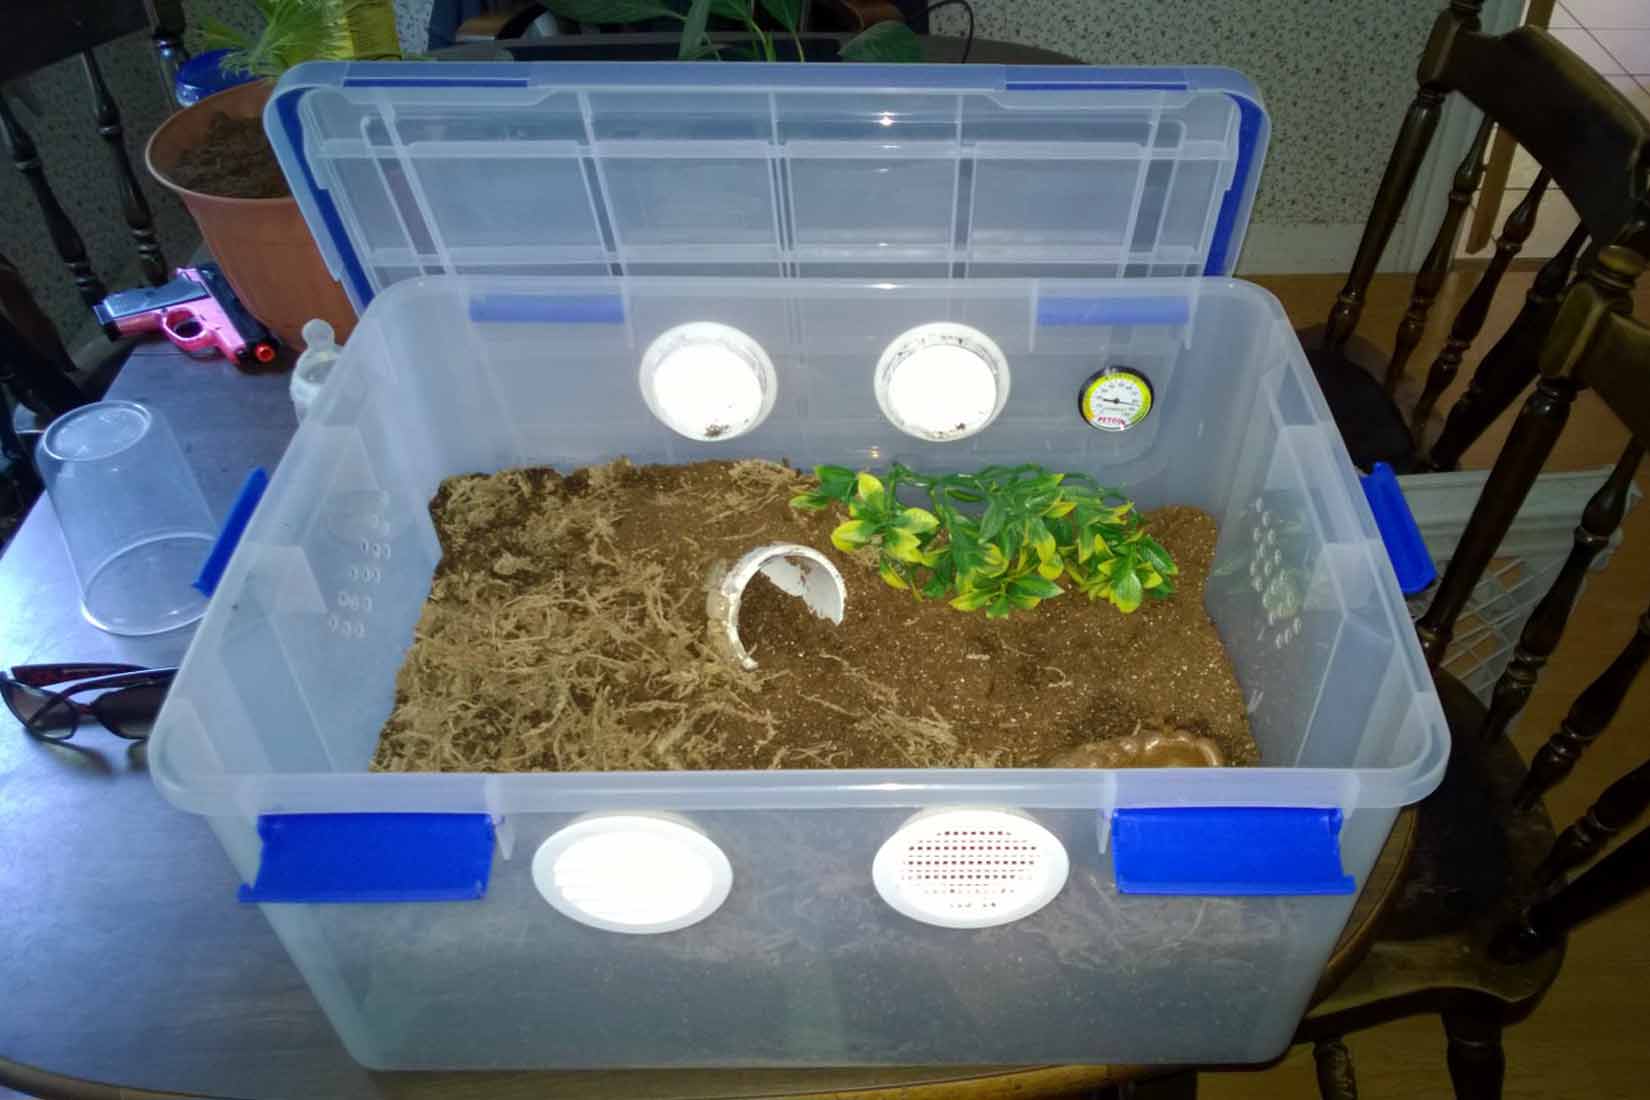
Ziploc 60-qt Storage Bin Modified.
For the initial venting, I used four 3″ white circular plastic vents that I had purchased from roundvents.com for $1.32 each. Using a 3″ hole saw and my power drill, I cut two holes on each of the long sides of the container (Note: if you don’t have a hole saw, you can trace the vents, then use a regular bit to drill a series of holes all round the edge. Then, using a sharp utility knife, just make cuts and connect the holes). I then glued the vents in place using Aquarium Silicone. To promote cross-ventilation, I positioned the vents on opposite sides of the enclosure.

Ziploc 60-Quart plastic storage bin with two 3″ plastic vents installed on each side.
As the T. blondi will need to kept in moist soil, and I will have to add water from time to time to keep the humidity up, I experimented with soils a bit before coming up with the formula I used. I combined Scotts organic topsoil ($2.10) with organic peat moss ($9.99) mixed at about a 60/40 ratio. To this mixture, I then added several cups of vermiculite ($3.99) to help with water retention and percolation. (Note: As the topsoil comes in .75 cubic feet bags, and the peat moss comes in a huge 3 cubic foot bag, there is plenty of substrate left over for other enclosures).
I added water to this mixture until it was damp enough that it would hold its shape when squeezed, but not so wet that water would run out of it. After adding about 1/2″ of moist vermiculite on the bottom of the enclosure to hold moisture, I packed down about 5-6″ of my substrate mixture on top of it.
For a hide, I purchased a 3″ PVC elbow from Lowes for about $2.76. I wanted something that wouldn’t decompose or mold in the moist soil, hence why I didn’t use cork bark. I turned the elbow on its side, angling one end up for the entrance and pointing the other end toward the substrate. I then buried this, making sure that there was a bit of a hide, but leaving some dirt in it for the T to clear. The T. stirmi can now continue to enlarge his burrow by digging through the submerged end.

3″ diameter white PVC elbow hide.
Finally, I added a large plastic water dish which I had on hand, as well as some long-fiber organic sphagnum moss to help with moisture retention. I also mounted a humidity gauge on the side of the enclosure to give me a rough estimate of what the humidity was inside.
With all of this done, I closed up the new enclosure and set it on the shelf for two days to see if it would maintain the correct level of humidity without spawning mold. I was looking to maintain a humidty level between 70 and 80% at about a 75º temperature.
Back to the drawing board.
During this trial run, the humidity in my home was around 75%, and the humidity inside the enclosure was steady at about 88%. When I opened it up after about two days, I immediately detected the slightest smell of mold or mildew. A closer inspection revealed that there was some light molding around the long-grain sphagnum moss. I removed the moss and left the cover off of the enclosure for a day to let some excess moisture evaporate. I later added a much thinner coat of moistened moss.
Obviously, the four vents I had installed wouldn’t be enough to allow for proper ventilation. Time for adjustments…
Using a 5/16″ drill bit, I drilled about 10 holes in the ends opposite where I installed the vents. I was hoping these would supply much needed cross-ventilation and prevent the humidity from remaining so high that mold and mildew occurred.
With these changes made, I closed up the enclosure and left it to sit another day.
Revision three
After about 24 hours, I took the cage out again. During this period, the humidity inside the cage was lower but still in the mid 80s. This wasn’t bad, but if the humidity in my home went up, so would the humidity in the enclosure, leading to levels that would promote mold growth.
This time I added about 15 more holes on each side and sealed it up again to see if this would lower the humidity even further. So far, so good! The humidity is holding right around 78% (the humidity in my home is around 64%)

Holes drilled for extra ventilation during the humid summer months.
As the humidity levels here can hit 80%, I may drill a few more holes in preparation for those really humid days. In the winter, our furnace dries out the air causing the humidity to plummet to the high teens. When this happens, I will use plastic and tape to cover up some of the holes to restrict some of the airflow and to prevent the cage from drying out.
Preparation and planning was key.
Had I tried to put this cage together without allowing myself time to experiment, this could have been a nightmare. I can’t even imagine trying to clean out the cage and make alterations while a 5″ T. stirmi was lurking inside. As humidity levels can vary depending on time of year and location, I would advise anyone setting up an enclosure for one of the moisture-dependent species to allow themselves some time to monitor levels and to make adjustments as needed. I have two more days before this beauty arrives, so I will continue to keep an eye on the humidity and make more changes as needed.
To be continued…
