Now that I’ve got my new sling, what do I house it in?
When I made the decision to purchase my first tarantula slings, I next needed to choose which enclosures I would use to house my new acquisitions. I had researched many alternatives, from deli cups to dram bottles, and I wanted to be sure to choose something that would allow me to maintain the appropriate environments my spider’s would need. Too much ventilation and I would risk the enclosure, and my T, drying out. Not enough ventilation, and the stuffy, overly-moist conditions could prove a death trap. I also had concerns about security; namely, would my T be able to escape from ventilation holes (or would the design of the home make it easy fro the spider to scoot out when it was opened for feeding or cleaning?).
As luck would have it, my first sling purchase was made at Jamie’s Tarantulas, and I took advantage of a couple deals she was running that included both a sling and one of her wonderful sling enclosures. I still use these enclosures, as they offer many perks that I will get to later. However, since then, I’ve done a lot of experimenting with other types of homes for my slings, and I’ve discovered some “found enclosures” that are also quite useful and versatile. So, if you’re on the lookout for a good sling enclosure, you may consider the following.
Deli Cups

A couple simple deli cups. Note: if using these to house a sling, I would not use the screened top as it would allow for too much airflow.
Deli cups are an enclosure staple in the hobby, and for good reason. They are inexpensive, versatile, come in many sizes, and are easily-acquired. They are also stack-able, which can allow those with large collections to easily conserve space. Full disclosure: I personally don’t use deli cups to house my Ts; I have always used other alternatives. But to ignore deli cups on a list of suitable alternatives would be ridiculous.
PROS:
- Inexpensive
- Come in many sizes
- Readily available
- Versatile
- Easily adapted
- Stack-able
CONS
- Not the most attractive (for those looking to display)
Jamie’s Tarantulas Spiderling Enclosures

Three sling enclosures from Jamies tarantulas. I have a dozen of these, and I love them.
To date, I’ve purchased about a dozen of these, and I still love and use them. For those buying slings from Jamie’s site, picking up one of these little beauties is almost an academic decision. Not only do they look great, but for a very reasonable $7.95, you get all the fixings, too (cork bark, silk plant, coco substrate, and moss), which is SO convenient. They look great on a shelf, and I’ve safely housed over 20 slings in them without incident.
Before using one of these enclosures for the first time, you will want to open and close it several times, as the cover fit can be quite stiff initially. Personally, I like how you can basically “hinge” the top on the bottom when feeding Ts, which keeps the opening small and prevents escapes. She sells these enclosures in both terrestrial and arboreal versions.
PROS:
- Very convenient when purchasing slings from Jamie’s site
- Good value with all of the fixings
- Gorgeous display enclosure
- Very secure
- Good visibility
- No modifications needed
- Rectangular shape and top vents means you can fit many on a small shelf
CONS:
- Can be pricey when compared to “found enclosure” alternatives
- Can’t be stacked on each other.
Plastic Dram Vials

Plastic vials used to house small slings.
Like the deli cups, plastic dram vials are used by many keepers to house their slings. They are inexpensive, easily adapted, and fantastic for keeping in precious humidity. Plastic dram vials come in many sizes, including very small sizes perfect for tiny slings. Pictured above are two that are currently housing 1/2″ Hapalopus sp. Columbia slings, and a smaller dram which is home to a 2/5″ B. albopilosum sling. All of these slings started off much too small for my other enclosures, and the smaller sizes of the plastic drams proved the perfect alternative.
PROS:
- Inexpensive
- Readily available
- Come in many sizes (Great for tiny slings)
- Secure
- Easily adapted
- Wonderful for holding in moisture
- Great visibility
CONS:
- Not safely stack-able
Ziploc Twist n Lock Storage Containers

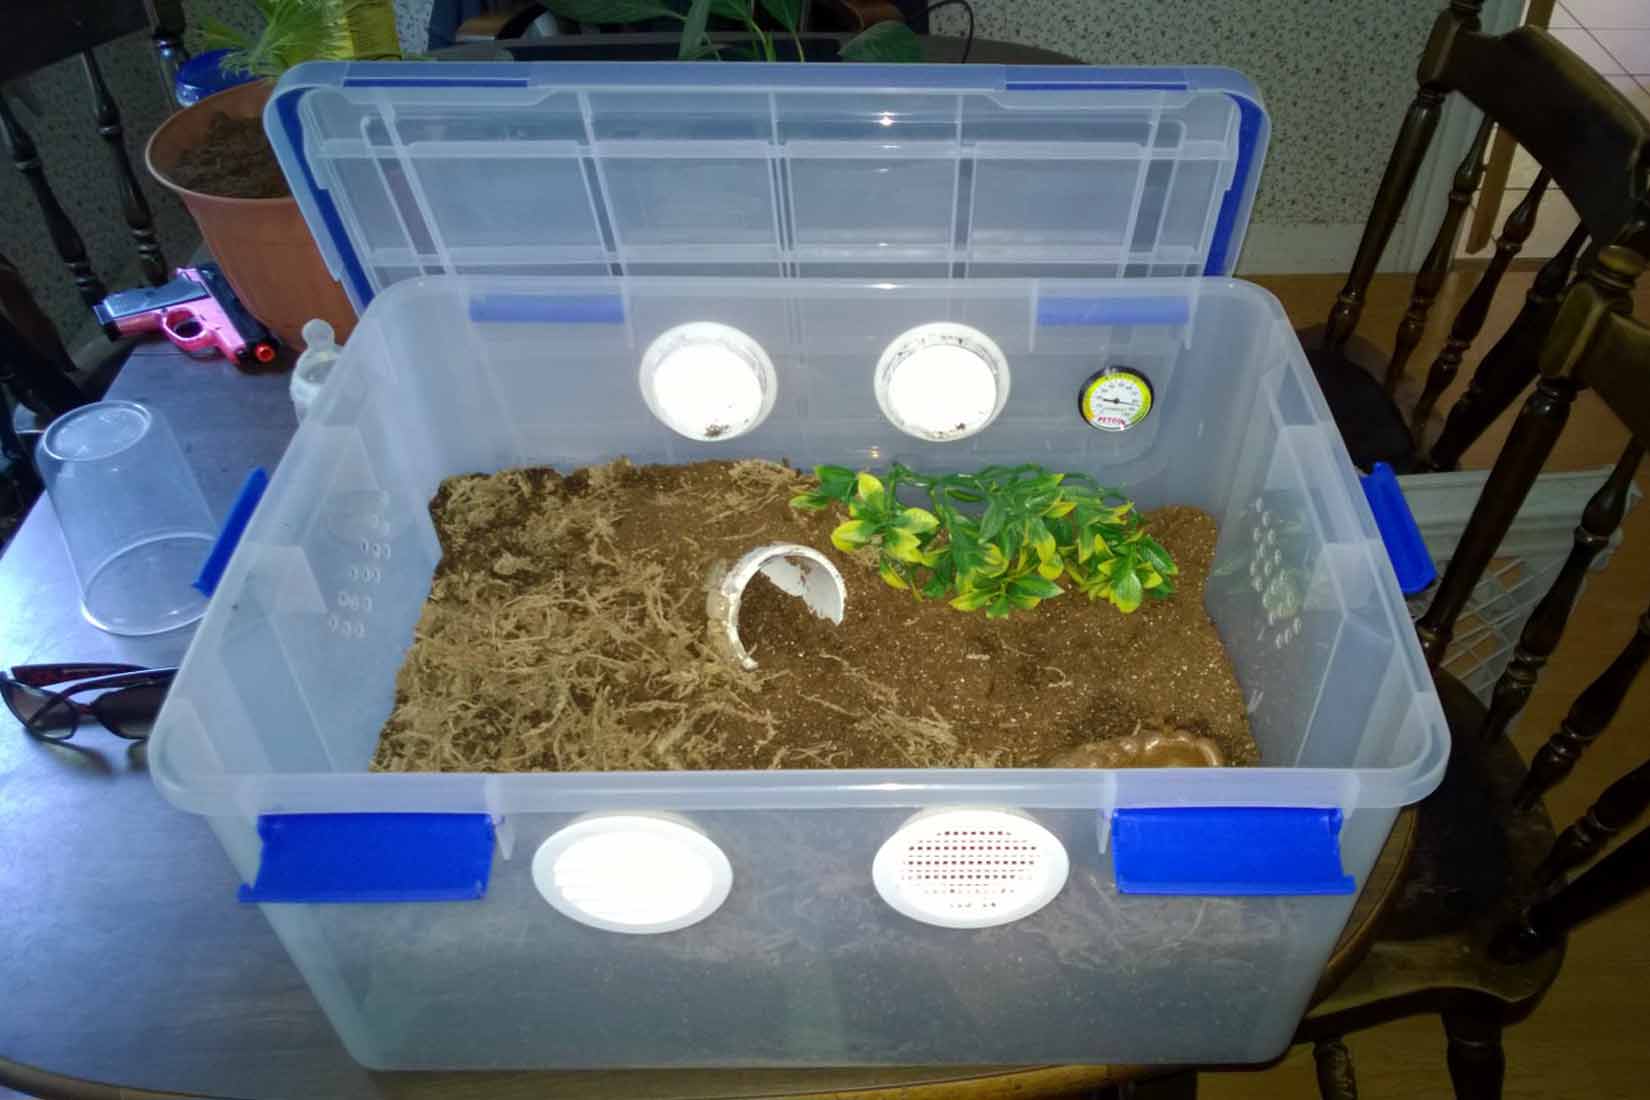
Modified Ziploc storage containers. These are very versatile and can be used to house burrowing, terrestrial, and arboreal Ts.
I started using these several months ago after buying a boatload of plastic containers at Walmart to experiment with as enclosures. Since then, they have quickly become my go to enclosure for slings 1″ or larger. Although they come in two sizes, I have switched almost exclusively to the taller size shown above. As you can see, you can fill it with more substrate, meaning burrowing species can dig elaborate burrows (H. gigas), or use less substrate and a piece of cork bark for arboreal species (the P. metallica on the right).
These enclosures are easily modified with a hot nail or soldering iron, and they are wonderful at holding in moisture. They feature secure, twisting lids that offer wonderful security, and they are stack-able, which is great for space-saving. At about $2.50 for two, they are also very inexpensive. I love using these for faster-growing species, like my Phomictopus, as they are roomier than other enclosures and allow more room for growth.
PROS:
- Inexpensive
- Very versatile (can work for burrowing or arboreal)
- Secure
- Easily adapted
- Stack-able
- Attractive
CONS
- Blue lid makes it tough to see in from the top
Just the tip of the iceberg…
These are, by no means, all of the possiblities out there. Tarantula message boards are rife with other examples of “found enclosures” that keepers have used. It’s fun to experiment with different types of cages, so creativity should definitely be explored. Just keep in mind that a good cage should:
- Be secure
- Be appropriately sized
- Able to maintain the optimal environment inside
- Appropriately ventilated
I will continue to try to find new and interesting enclosures, and if anything should prove particularly effective, I will definitely add it to this list.